This is a guide intended to show the steps to set up AD for a lab and not meant for large-scale deployment as you would deploy these services on different servers.
This is a guide for setting up a Certificate Revocation List (CRL).
CA Setup
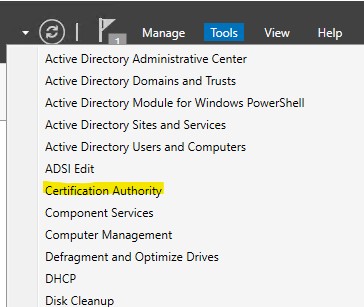
1.) From server manager open “Certification Authority”
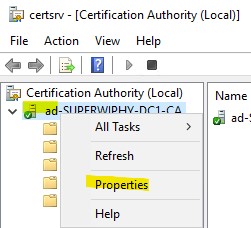
2.) Right-click the server and go to “Properties”
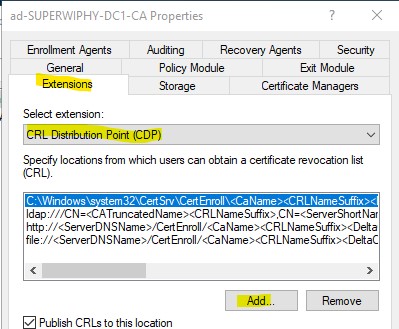
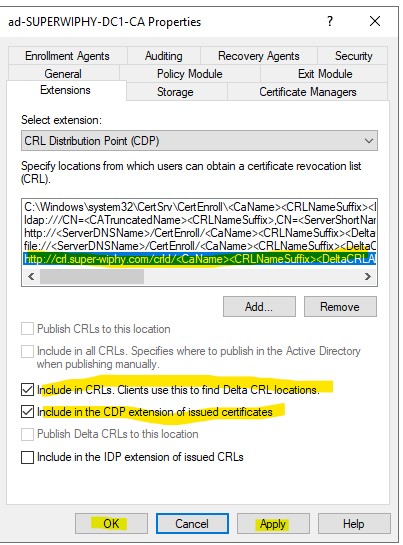
3.) Go to the extensions tab and leave on CRL and click add.
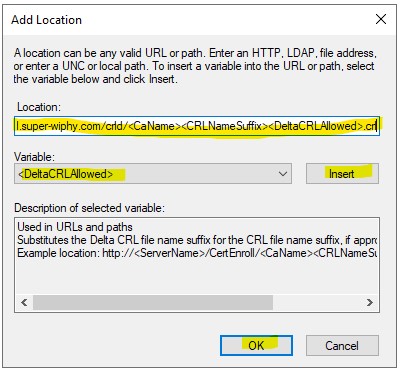
4.) Enter the location as http://crl.domain.com/crld/ then select each of the following in the drop down and click insert.
<CaName>
<CRLNameSuffix>
<DeltaCRLAllowed>
Then append .crl at the end
5.) Once the url is added check the boxes for the following:
Include in CRLs. Clients use this to find Delta CRL locations.
Include in the CDP extension of issued certificates
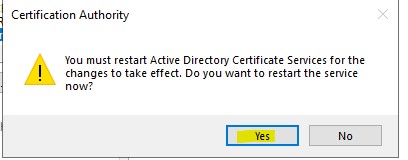
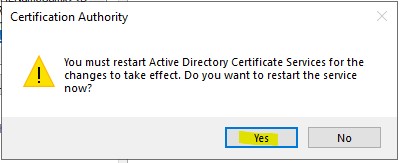
6.) once you click apply/ok you will be asked to restart the ADCS, click yes.
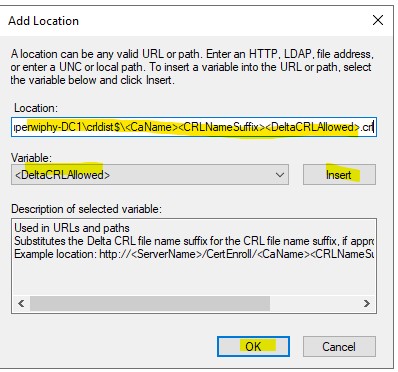
7.) add another but this time it will be UNC \\DC-Name\crldist$\ then use the drop down to add the following.
<CaName>
<CRLNameSuffix>
<DeltaCRLAllowed>
Then append .crl and click ok.
8.) Check the following boxes:
Publish CRLs to this location
Publish Delta CRLs to this location
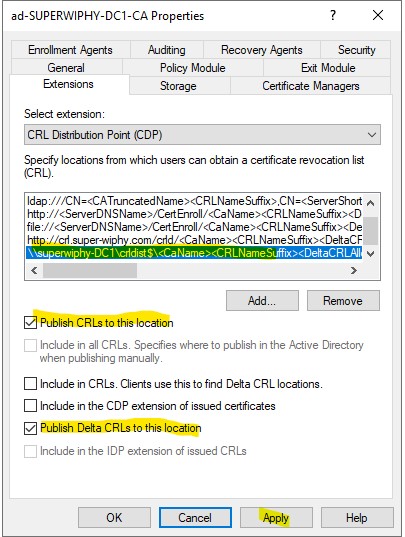
9.) once you click apply/ok you will be asked to restart the ADCS, click yes.
CA Config is complete now verify DNS on the DNS Tab.
DNS
1.) From server manager open DNS manager.
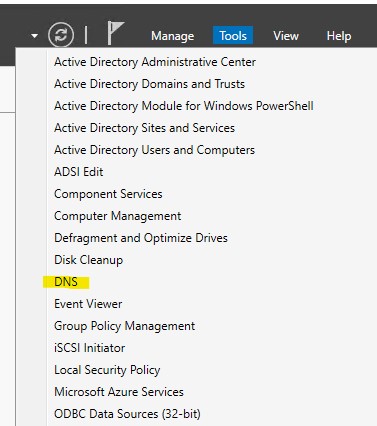
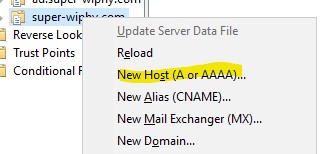
2.) verify an A record exists for the server in the appropriate domain if not then add it. Right-click the domain and select “New Host (A or AAAA)…”
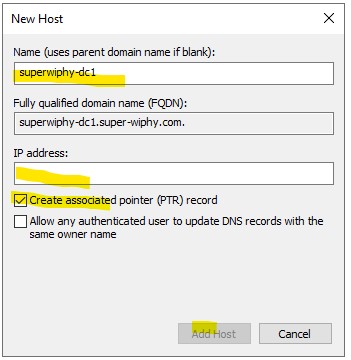
3.) In the new host window enter the server name, IP address and check the create PTR and click add host.
Now go to the IIS tab and walk through the settings for IIS.
IIS
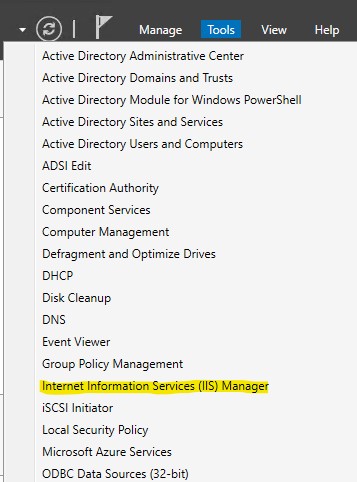
1.) In server manager open “Internet Information Services (IIS) Manager”
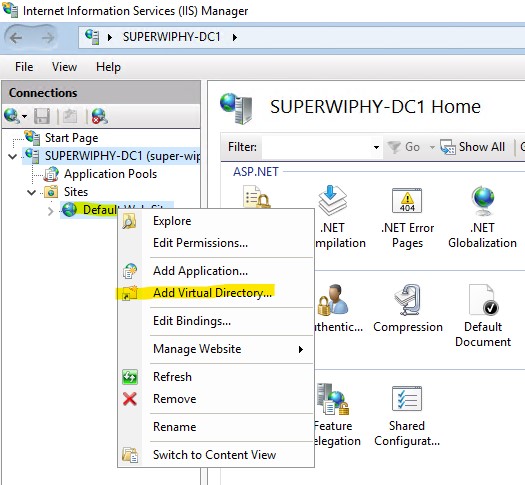
2.) Expand to the “Default Web Site”. Right-click it and select “Add Virtual Directory..”
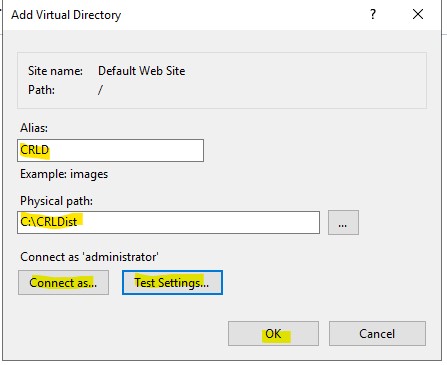
3.) Add CRLD as the alias, in the following steps you will add a folder for the path and test the settings.
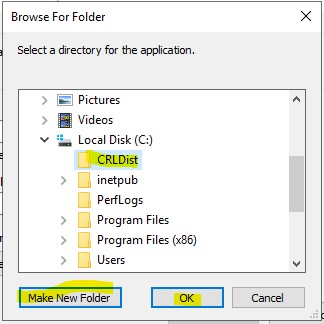
4.) Point to the local disk and click “Make New Folder”, name it CRLDist and click ok.
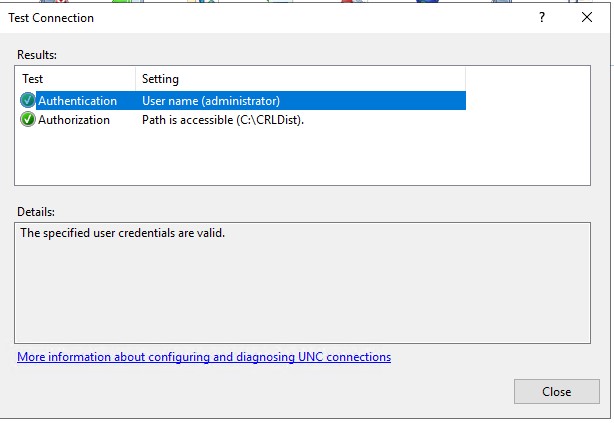
5.) when you click test settings you will see the below if everything is ok. if Authorization fails then change the user with the “Connect as…”.
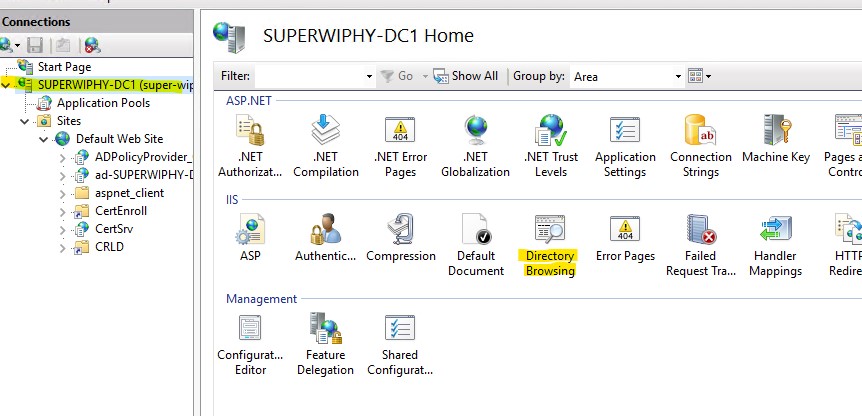
6.) In IIS Manager click on the server and then double click “Directory Browsing”
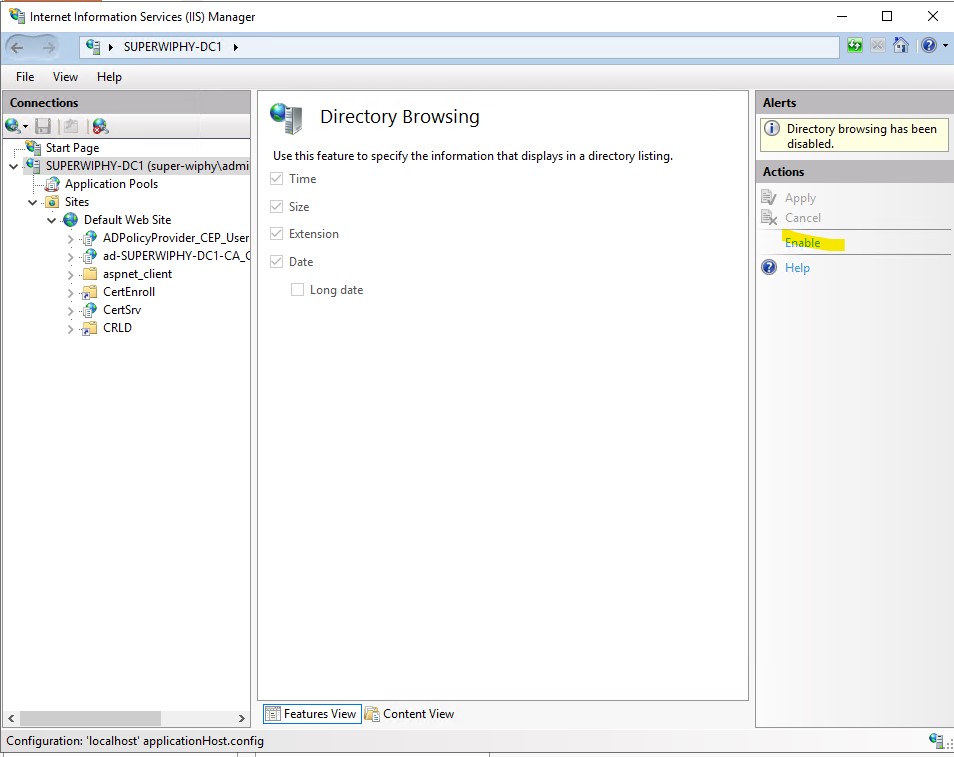
7.) Click enable.
8.) Then on the left click on the CRLD virtual directory and double click “Configuration Editor”
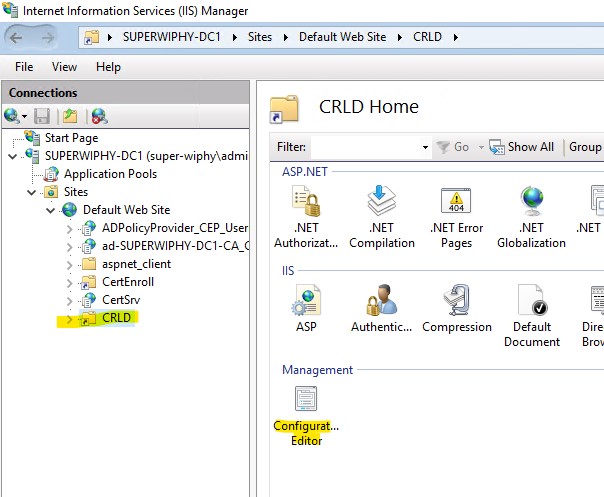
9.) in the drop down locate system.webServer > security > requestFiltering
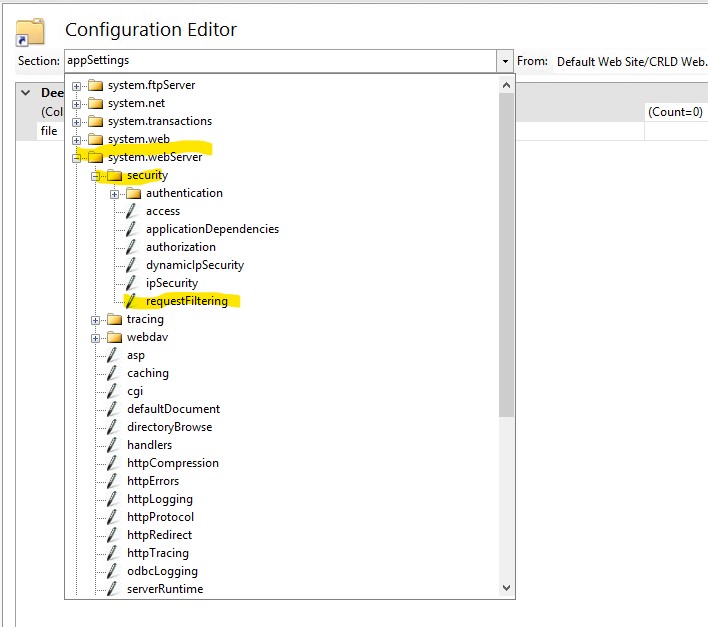
10.)

IIS setup is complete, now got to the folder permissions tab to setup the folder and publish the CRL.
Folder Permissions
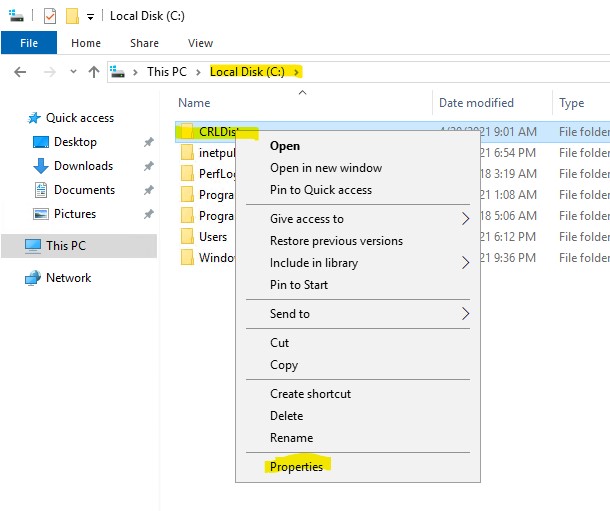
1.) Open file explorer and go to the root of the local disk, right-click the CRLDist folder and select “Properties”.
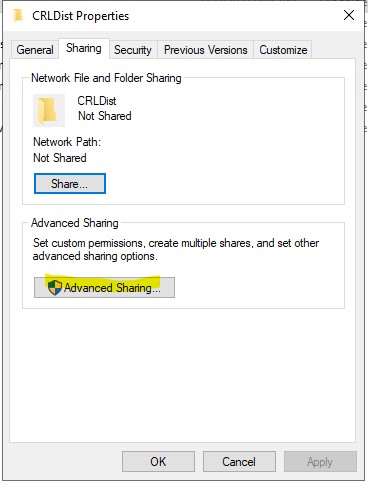
2.) Click on “Advanced Sharing…”
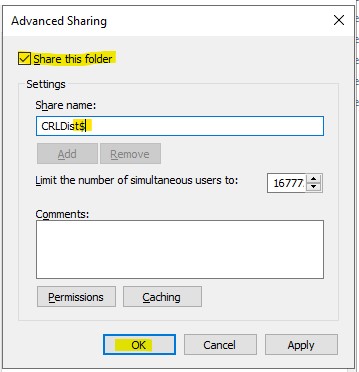
3.) Check the “Share this folder” box and add a “$” to the end of the name. Then select “Permissions”.
4.) Click the “Add…” button
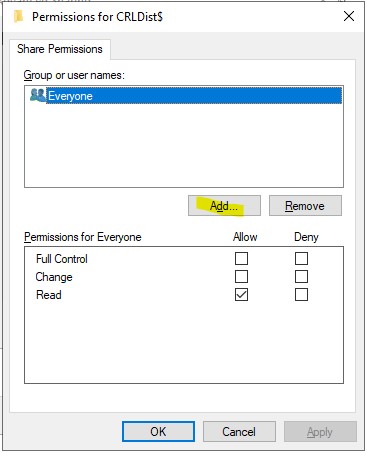
5.) Click the “Object Types…” button
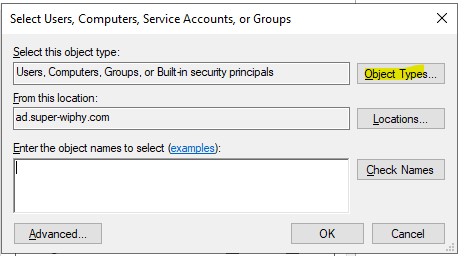
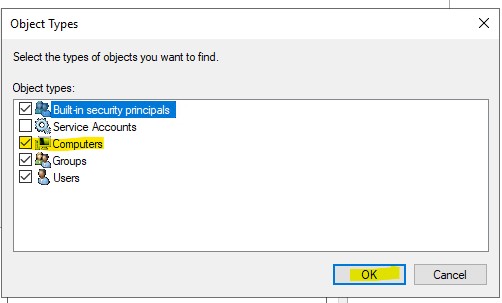
6.) Check the box for “Computers” and click ok
7.) Enter the name of the DC and click “Check Names”, then click ok
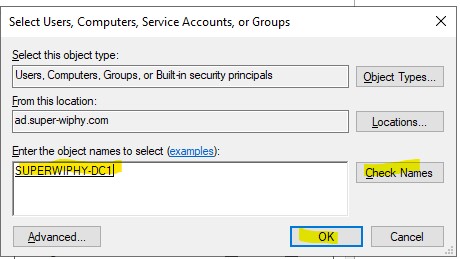
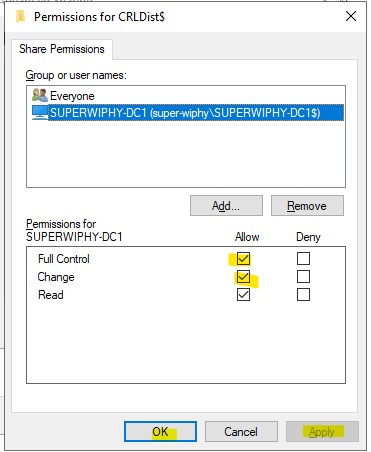
8.) select the DC and add “Full Control” and “Change” permissions then click ok/apply.
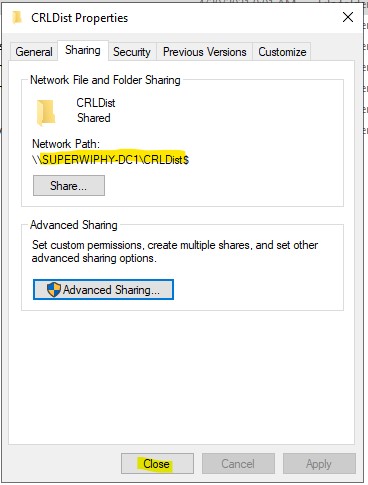
9.) on the properties screen you will see the path is updated and should contain a “$” at the end. If so then close the window.
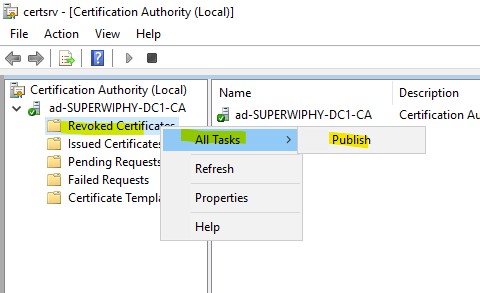
10.) Open up the “Certification Authority” Manager. Right-click on “Revoked Certificates” select “All Tasks” then “Publish”.
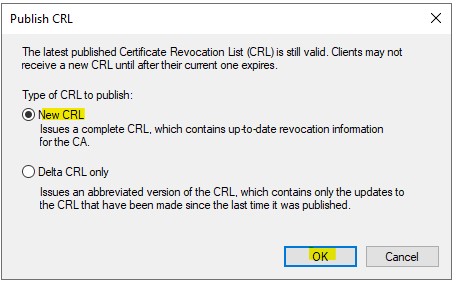
11.) Select “New CRL” and click “OK”
12.) Go back to File Explorer and navigate to the CRLDist folder and verify the following 3 files exist.
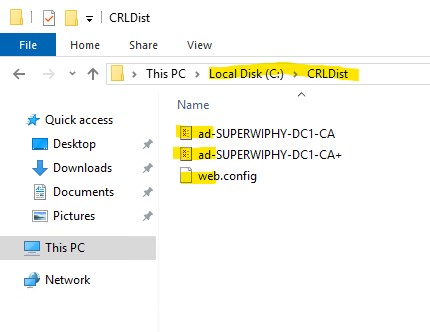
Once you have verified that the files were publish you are done setting up the CRL and can move to OCSP if needed.
