This is a guide intended to show the steps to set up AD for a lab and not meant for large-scale deployment as you would deploy these services on different servers.
This is a guide for setting up an online responder or OCSP (Online Certificate Status Protocol). I set this up as I needed an OCSP server to handle 2FA with the Cisco WLC Web Admin page. OCSP requires a CRL to be set up so make sure that is completed prior to starting this guide.
Setup OCSP Signing
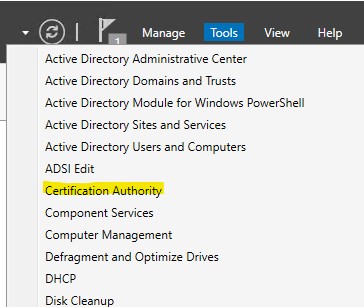
1.) From server manager open “Certification Authority”
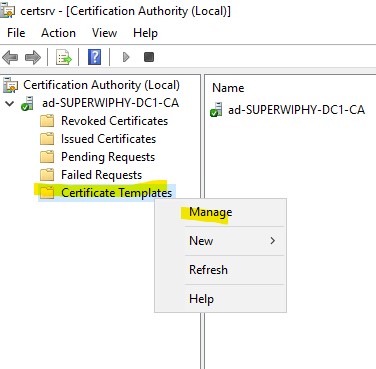
2.) Right-click on “Certificate Templates” and select “Manage”
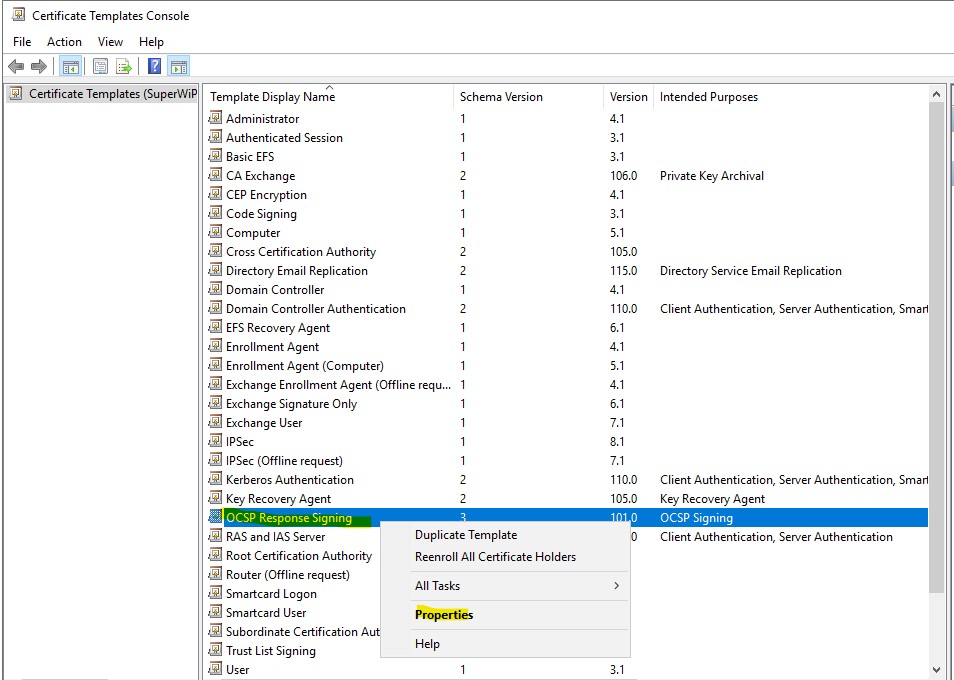
3.) Find “OCSP Response Signing” right-click it and select “Properties”
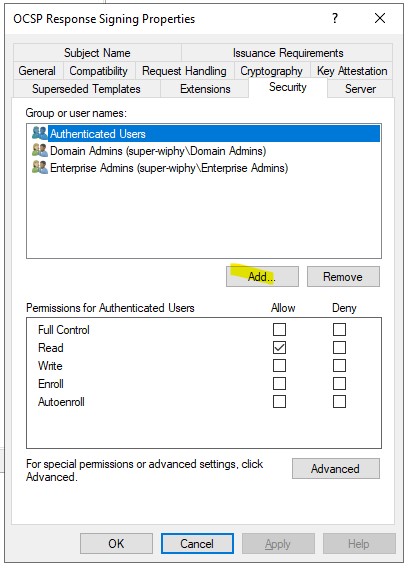
4.) Go to the “Security” tab and click “Add..”
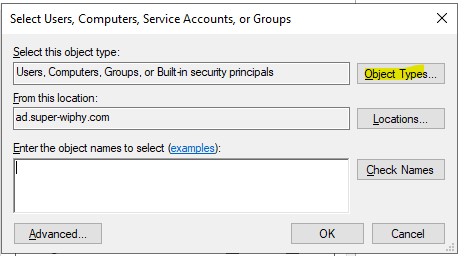
5.) Click on “Object Types…”
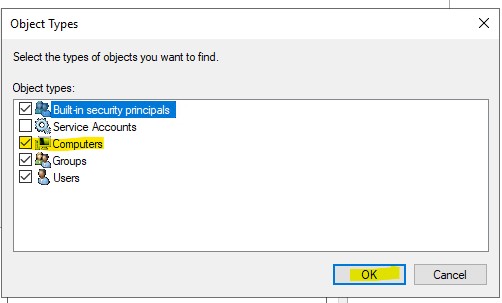
6.) Check the box for “Computers” and click “OK”
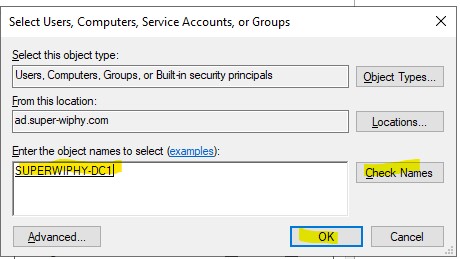
7.) Enter the DC namd and click “Check Names” then click “OK”
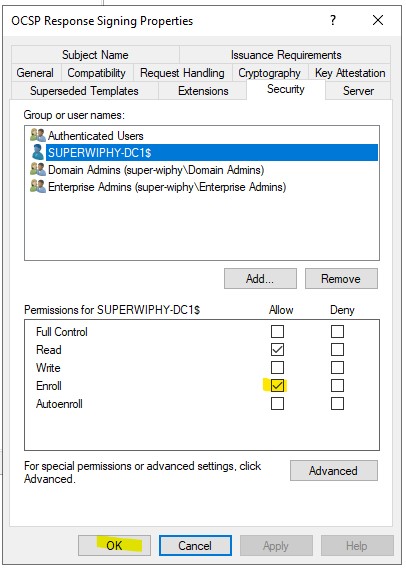
8.) Add the allow “Enroll” and click “OK”
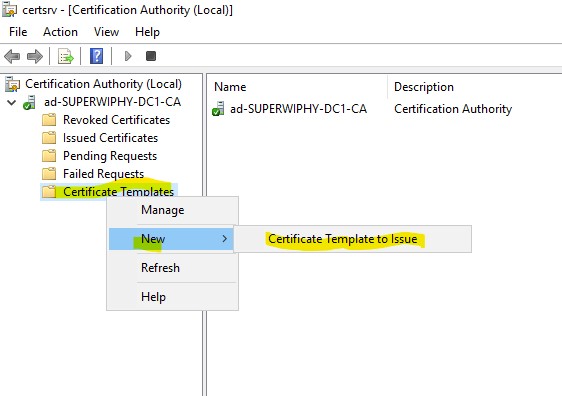
9.) Go back to the “Certification Authority” window and right-click “Certificate Templates” select “New” > “Certificate Template to Issue”
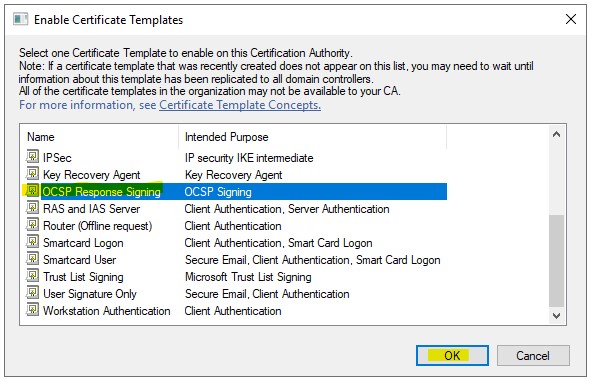
10.) Find “OCSP Response Signing” select it and click “OK”
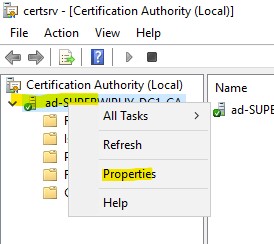
11.) In “Certification Authority” right-click the server and select “Properties”
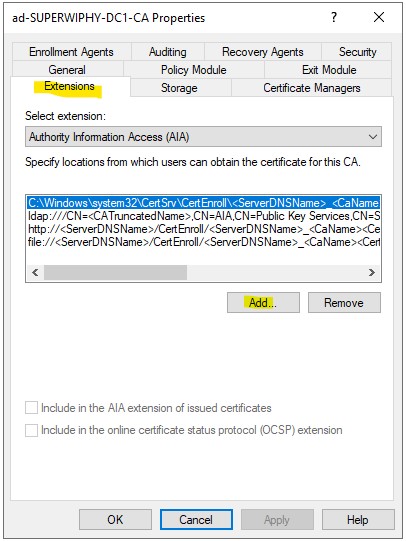
12.) Go to the “Extensions” tab and chang the exntions to “Authority Information Access (AIA)” then click “Add…”
13.) Add the locatio in using http://crl.domain.com/ocsp and click “OK”
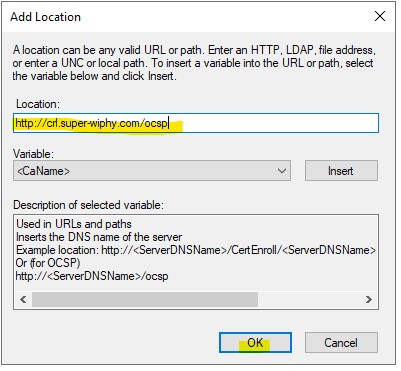
This completes the OCSP signing setup, move the next tab for installing the online responder service.
Install Online Responder
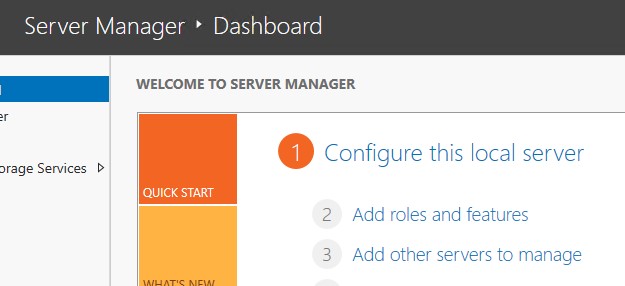
1.) From server manager click on “Add roles and features”
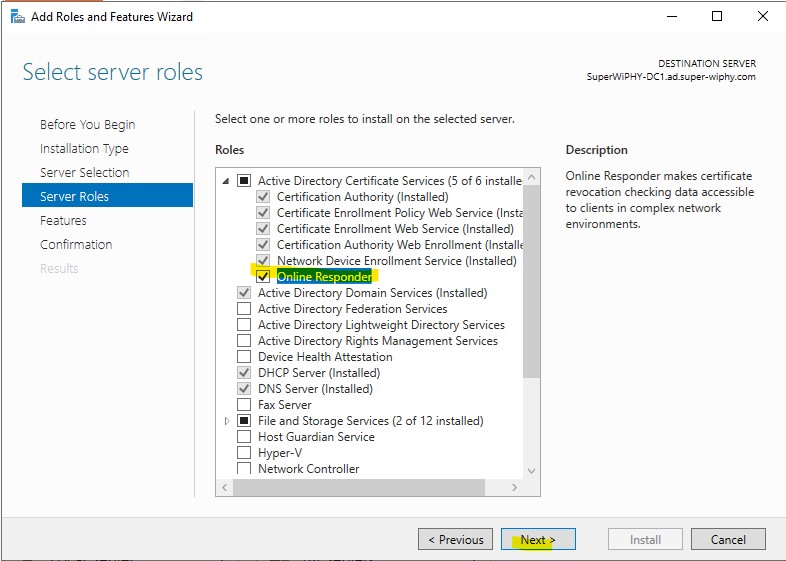
2.) click next till you get to server roles (if using RSAT on another system make sure to select the correct server in server selection). Check to expand the “Active Directory Certificate Services” and check the box next to “Online Responder”. Then click next.
3.) Click next till you get to confirmation and click install.
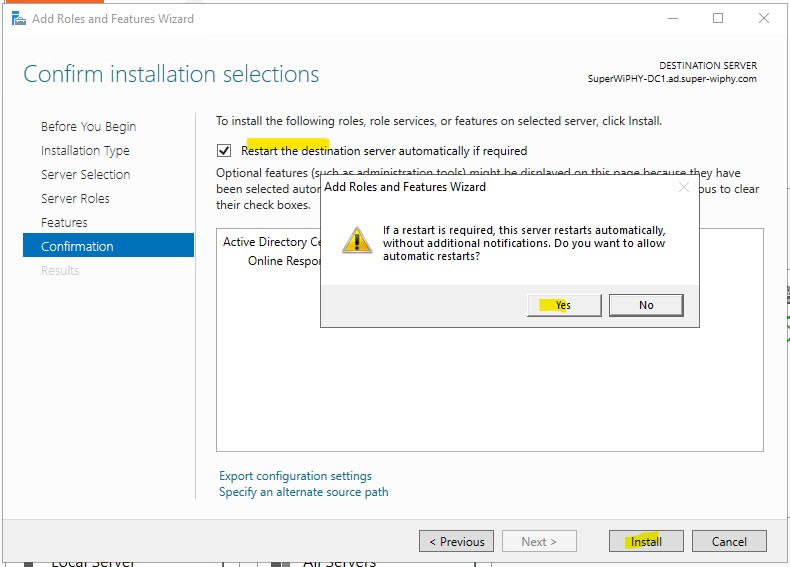
This completes the Online responder install, move to the next tab to setup the OCSP certificate with the CRL.
OCSP Certificate Setup
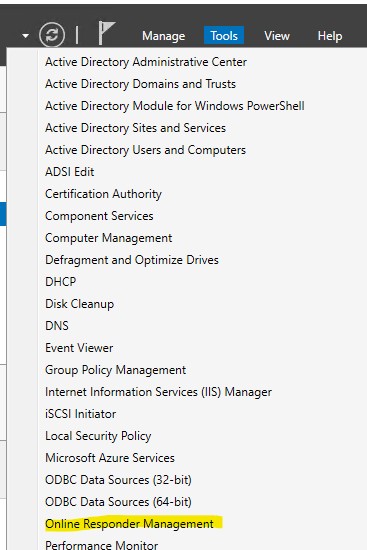
1.) From server manager open “Online Responder Management”
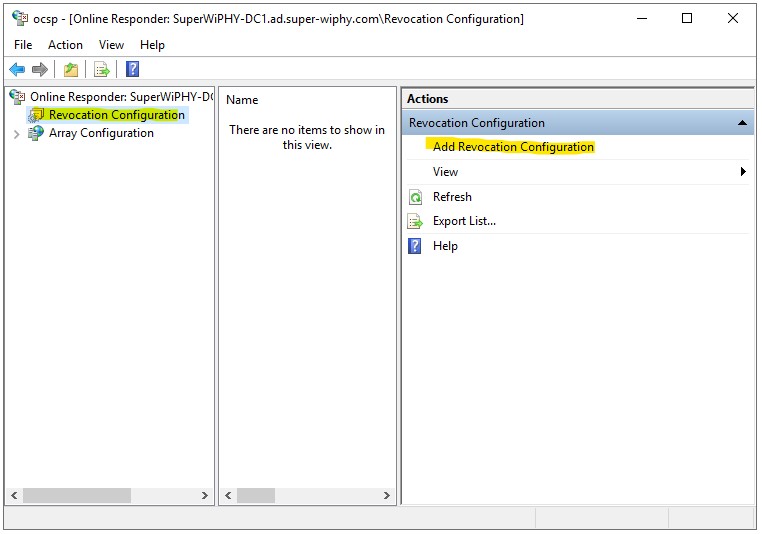
2.)Click on the “Revocation Configuration” and then click “Add Revocation Configuration”
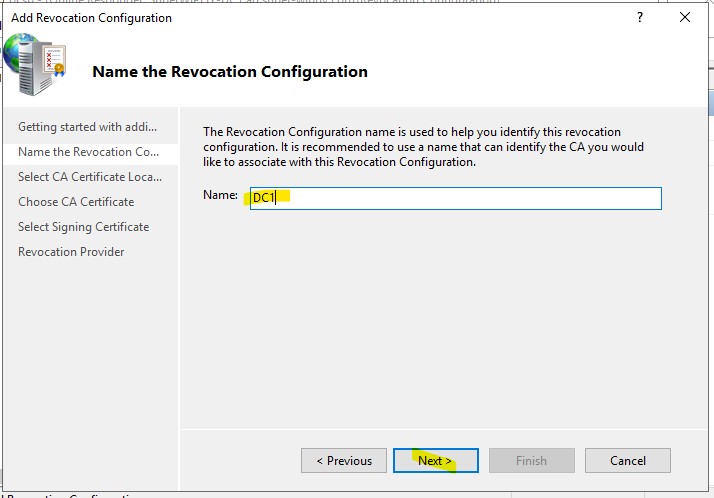
3.) on the “Name the Revocation Congiuration” step enter a name to identify this CA and click next
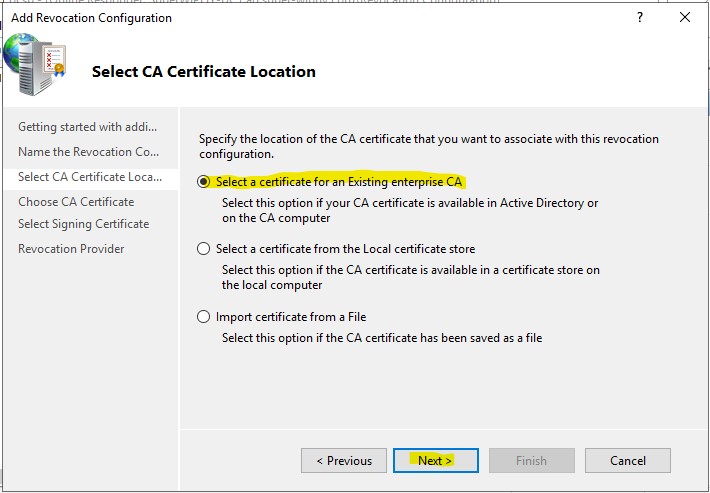
4.) Select “Select a certificate for an Existing enterprise CA” and click next
5.) Click the “Browse…” button
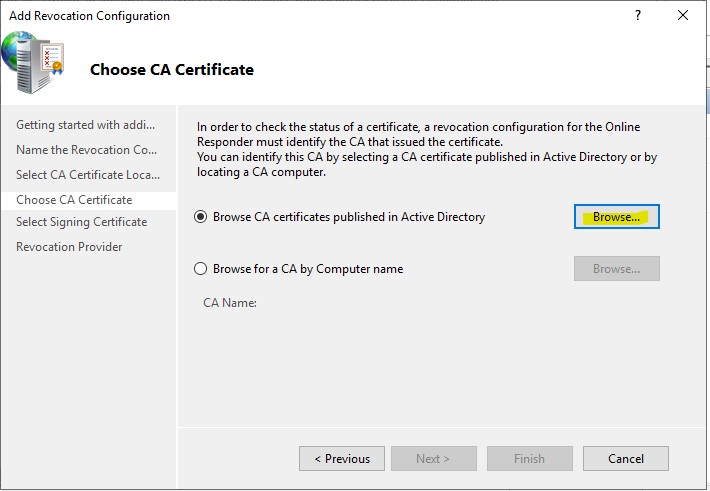
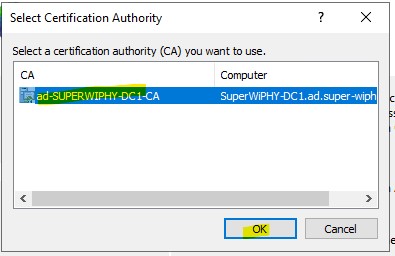
6.) Select the appropriate CA and click “OK”
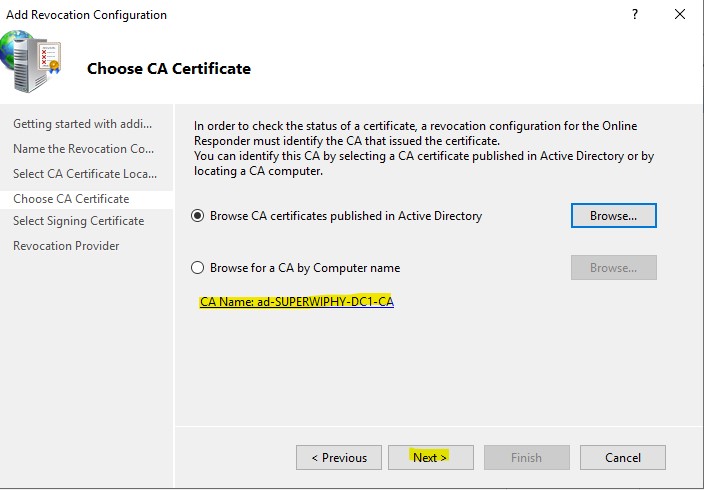
7.) You will now see the CA Name and can click next to proceed
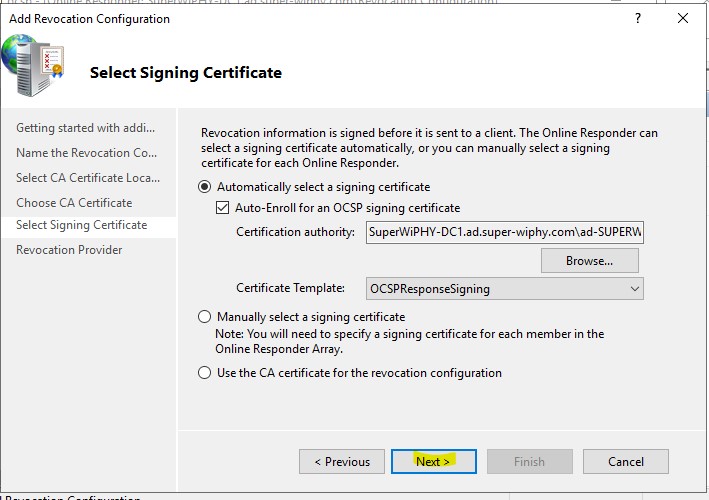
8.) Click next
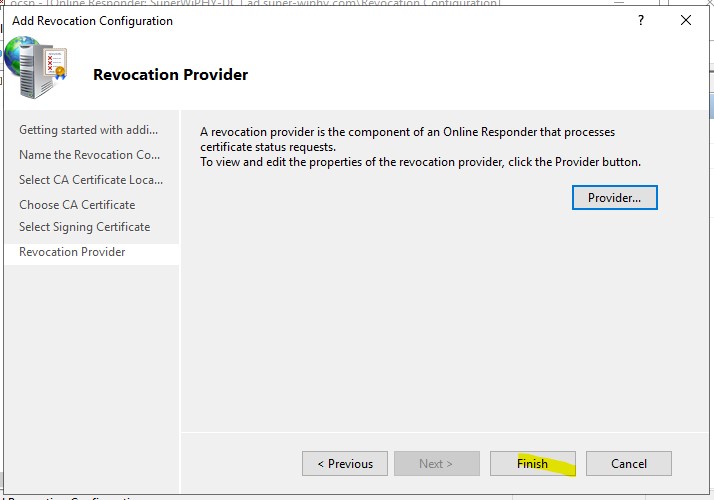
9.) Click Finish
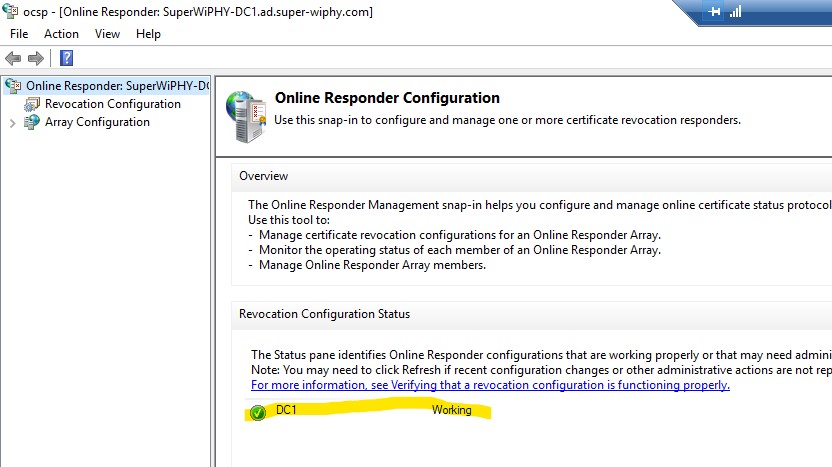
10.) Now you should see the “Recocation Configuration Status” as “Working” next to the name choosen in step 3
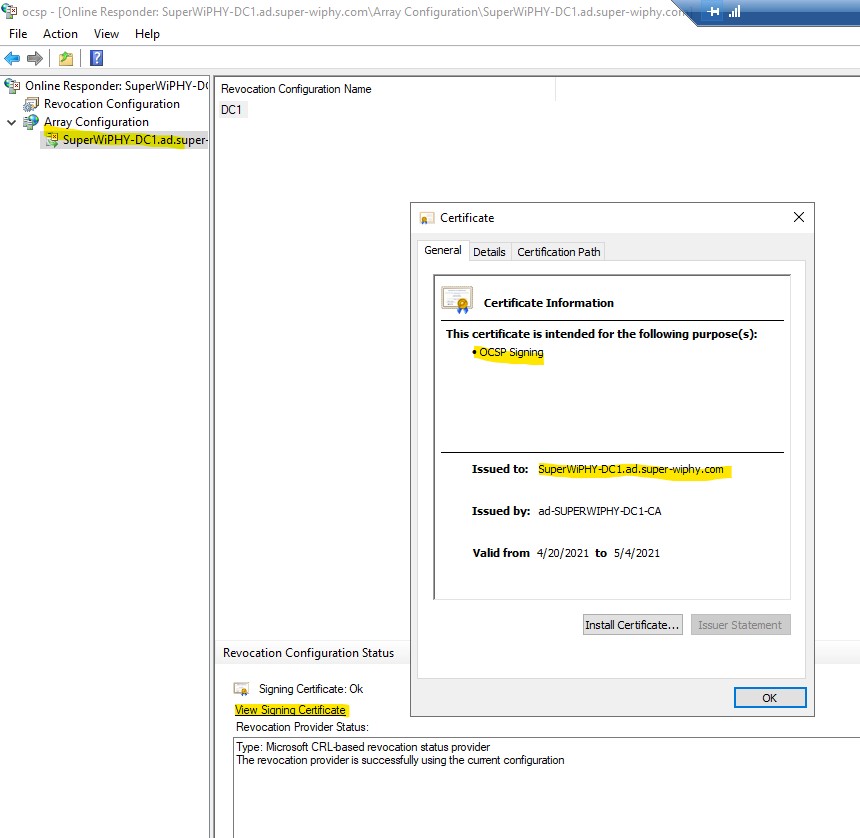
11.) To verify the Certificate expand “Array Configuration” and click on the server. Then click on “View Signing Certificate” and verify the purpose and issued to fields.
OCSP is not setup and ready to use.
